Tuesday, November 30, 2010

Triangle Tutorial Part 2


Here is the next row. Two peyote beads are in this round. And each round will increase
the peyote section and the overall size of the triangle.
You can make all kinds of patterns in the peyote section.

Triangle Tutorial Part 1


BasiC instruction for a triangle. The are a combination of peyote stitch and herringbone.
Begin with stringing 3 beads and tying in a circle. Pass the needle through the first bead
and add 2 beads (these 2 become the herringbone). Pass the needle through the next bead and add 2, pass through the 3 bead and add 2. Pass the needle through the first bead
added above that is the first bead of the herringbone stitch.

Sunday, November 28, 2010

Book Review - 'Beading with Cabochons'


'Beading with Cabochons' by Jamie Cloud Eakin. I just got this book, Santa often comes early to our house. It's been out awhile, but I wasn't interested in off-loom stitching then. Now, there are just SO many things I want to try stitching.
The book is filled with eye candy, ideas, inspirations and instructions for a lot of projects. Available on Amazon at a very reasonable price. Don't miss this one.

Saturday, November 27, 2010

Triangle of Joy


Triangles are fun and easy to do. And you can make a lot of things with them. This one will be an ornament. If you have never made a triangle want want to see it done, let me know and I'll post photo's. I'm making a second triangle like this one and then will be stitched together. Maybe some jingle bells or bows to embellish.

See how tightly Delicas fit together? So much nicer than seed beads. This is done with Delica 11/0's # 602 and 605. Both are silver lined and a little hard to photograph. I've included one with flash and one without.

Friday, November 26, 2010

Coffee/Tea Cup Swap at the Hive/Swap Received


Jan MacKay organized a Coffee/Tea Cup Swap at the Hive . Cyndy Weeks was my swap partner
and I received it today. Isn't it cute? A jolly little Santa cup and Cyndy included a Santa ornie and
treats - chocolates and coffee - A real buzzzzzzz! lol Thanks so much Cyndy. Everything is great!

Beaded Ornament Cover #2


Different pattern this time. I had a lot of these 11/0's silver lined green beads, so this one is loaded! These are Czech beads though and really gave me a new appreciation of Miyuki beads.
Czech beads really are NOT cheaper if the vary so much in size and shape that you end
up culling so many out of a package. What a waste.
The top is done in herringbone. The bicones are 6 and 12 mm and some white pearl drops.

Thursday, November 25, 2010

And the Winner of the first contest is........

The winner of the contest is
Thepricklypinecone with her guess of 527 - there were 671 beads in the box.
Please be sure to read the rules. All guesses must
be posted here on the blog - NOT on the Hive site.
Happy Thanksgiving to everyone. Enjoy the day!

Wednesday, November 24, 2010

Second Contest Giveaway


I'll be counting up the beads in the First Contest Giveaway and will announce the winner tonight.
I continue to de-stash some beads and here is the Second Contest Giveaway.
This is not a newly purchased item. I bought this several years ago. It's called Bead Bucket by Beadalon. It makes a handy little traveling container, but I quickly - quickly - outgrew it.
Besides storage inside the bucket, there are 5 detachable, storage boxes. You will win the container and all the beads show.

Your challenge, should you decide to accept it, is to guess the total number of beads in all 5 boxes.
Please read rules below and for those at the HIVE, guesses must be made here on the blog, not at
the HIVE so all participants can see the guesses.

1. First person to guess the exact number, (or comes closest without going over) of beads in this container wins.
2. Leave your guess in the comments below. First guess.
3. Become of a Follower of my Blog and leave a Second comment stating so and a Second Guess at the number of beads in the container.
3. If you blog about the contest on your blog, return here and leave a Third comment that you have blogged about the contest, a link to your blog, and leave your Third Guess in that comment.
4. Each Guess must be in 1st, 2d or 3rd separate post. If you read this on the Hive, you must
visit the blog and post comment here under this post. Guesses made on the Hive and not the actual blog will not be considered.
5. The contest will end on Dec 4, 10pm and winner announced within 2 days and mailed within 2 days from announcement. Any guesses made after
Dec 4 will not be considered.
6. Open to USA mailing addresses only. Sorry shipping anywhere else is just too darn expensive.

Good Luck

Alphabet R - Z


And here is the last of the alphabet. Give it a try. Here's wishing everyone a great Thanksgiving Day. Our forecast is for cold,windy and possibly snow flurries. Great day to stay inside and eat and eat - lol Enjoy! Enjoy!

Tuesday, November 23, 2010

Alphabet I - Q


If anyone makes use of these, I'd love to see photos of what you make.
I've got some teeny tiny jingle bells to work into a design next. Good thing
I bought lots of red and green seed beads last month.

Alphabet A - I in Peyote


Here's the start of the alphabet done in peyote. These are just small letters so they are good for personalizing a bracelet, ornaments, craft items and such. It is easy and works up quick.
Pattern created on the BeadCreatorPro program.

Christmas Ornament Cover


Here my dated Christmas Ornament Cover. I'll try working on an alphabet this weekend in case you'd like to try names on your. This is a pretty simple cover done in netting and swags. The center, of course, is peyote stitch. This one is done in 11/0's seed beads. I used #10 Silver Lined Flame and #284 White Lined Crystal AB (both Miyuki) and white pearl fringe beads. The little green holly leaves, I found at Michaels.

Sunday, November 21, 2010

Date in Peyote

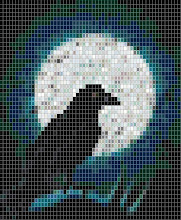
While I wait for my order of beads for the St Petersburg chain, I guess I'll start something new. I think I'll date this project. Maybe making one each year.
They would need a date, right? Already guessed what it is? More tomorrow.

Christmas at the White House


http://the44diaries.wordpress.com/2009/12/21/the-history-of-christmas-at-the-white-house-1977-2009/

Scroll down to the Clinton years....
Over her eight White House holiday seasons, First Lady Hillary Clinton showcased the talents of America’s artistic communities. Her 1993 “angels” theme coincided with “The Year of American Craft,” and the Blue Room tree was decked in 7,000 fiber, ceramic, glass, metal and wood angel ornaments.

We were doing crafts shows at the time and my husband carved a wooden angel ornament and painted her in red, white and blue. I'm sorry I don't have a photo of the angel he submitted,
but it was chosen to hang on the White House Christmas tree and he did receive a nice
certificate and Christmas card from the White House.

Here are some other Santas he carved that year. His hands aren't what they used to be so he hasn't done this for a long time.

Saturday, November 20, 2010

Cameo Brooch/Necklace


Finished what will be the brooch portion. I really liked how it came out. I decided to do the necklace portion in double St Petersburg chain stitch. The colors for the necklace will match the colors in the fringe. Of course, I don't have enough on hand so I'll have to order those this week.

Cab Bracelet


Here we are. I'm ready to sew it around the metal cuff form. But I have to wait til we go to
town again. I was doing ok, embroidering on the thin leather with a regular needle. But to encase the cuff form, I have to go through two layers of leather and I'm going to need one of those curve,
upholstery needles.
I'm very happy with the way the cuff turned out.

Snowflake - Part 5


Let's see if Blogger will co-operate today and let me post all the photos.
We last left off with our needle here.
Next, we turn the corner and through the next 3 beads. That will be the single bead that we added in the last round. Add 3
beads and go up and over and through the added
bead
Go through the next 3 beads to get to the corner,
turn and go through the next 3 beads to the added bead and repeat. Continue around. You should now have 8 points.

Now, if you'd like to embellish it, you might add a tear drop to the lower point, or a contrasting crystal bead in the center.

Friday, November 19, 2010

snowflake - Part 4


Next you will add one bead and continue through the next 3 beads. This will bring you out on the next corner bead. At the corner bead you will
repeat Step 6 and then 7 working your way around to the first Step 6 beads. Keep tension
tight. And here's what we look like at the end of S 6 and 7. It looks a little uneven because
the 6/0's I'm using are not very uniform.

Snowflake - Part 3


This is part 2 of the bead path after Step 4. This brings you up and in position for Step 6 - Add 3 beads and come up and over that corner bead,passing the needle through that same corner bead and through the next two beads. The needle is now coming out
between the two beads added in the previous row.

Snowflake - Part 2


Ok, our next step is
Step 4 - Pick up 2 beads and pass over the next bead, pass the needle through the next bead (corner).
Step 5, - repeat Steps 3 and 4, 3 more times.

And at the end of the repeats here is the needle
path to move up to the next row. You should have a rough square shape.

Blogger is giving me problems so I'm going to stop here and continue in another post

Thursday, November 18, 2010

Snowflake Part 1


This snowflake can be made in 15/0's for tiny snowflakes for embellishments or even earrings.
11/0's will make it slightly larger. Here I have made it in 8/0's and it is 1 inch. In the tutorial, I am using 6/0's. You could also make it up in crystals but I would use a light weight wire to give
it more support.

I've numbered the steps on the photos also in case blogspot gets them out of order.

Step 1 - pick of 4 beads and tie in a ring, pass needle back through the first bead.
Step 2 - pick up 1 bead, pass through the next, pick up 1 bead pass through the next,
pick up 1 bead, pass through the next. When you pick up the 4th bead, pass through
the next 2 beads.
Step 3 - Pick up 3 beads and pass up and over the same bead so the needle goes through
the same bead you are coming out of again.

Wednesday, November 17, 2010

Next Project - Cameo


Another day or two and I'll be finished with the bead embroidery around the cabochon and finish the bracelet.
This is my next project. I think it's going to be both a brooch and a necklace. The cameo portion will have a pin on the back and can be attached to a necklace also. These are some of the colors I may work with, but probably not all of them. Just narrowing down my choices.
Most of the suede backing will be trimmed away.
I think about 1/2" beading around the cameo, and maybe some fringe on the bottom

Tuesday, November 16, 2010

Christmas Bracelet Interchangeable


I made this last year, but never pictured the whole piece here. I made the bracelet in Herringbone stitch in frosted white delica beads (11/0's) with a touch of silver here and there. Then I made the snowflake and Christmas tree separately. Both the Christmas tree and the Snowflake feature Herringbone stitch. Each has a loop on the back, and each can be slid off and on the bracelet for two bracelets.

Christmas Bells Pattern Part 2


And here are the charts in 2 Drop Peyote Stitch and Herringbone Stitch. I think I may try the Herringbone stitch just for variety. The background color for this is an icy blue. If anyone makes up this pattern, please send photos and I'll post here, or if you have a blog and post it there, please send a link.