Saturday, October 29, 2011

Rings - Ezy Pzy


If you have not been to http://www.jewelrylessons.com - you must check the site out.
There are loads of tutorials there and many of them are free. If you write tut's, you can
also sell there.
These rings are made from the tutorial there
http://www.jewelrylessons.com/tutorial/ezy-pzy-ring
Most use less than a foot of wire and you can vary bead sizes. A great way to use those
extras rolling around your bead box. Variations are endless and they are oh, so easy to make.

Thursday, October 27, 2011

Copper Necklace - Part 3


Continuing on. I love the Swarovski butterflies. See # 9. And in #10, you'll notice the next few rings decrease in size down to a 9mm ring. the length of the necklace is now just about shoulder seam to shoulder seam on me. The rest will be chain with a clasp. BUT!! I am four jump rings short to finish up. So, I'm off to order more and will finish this as soon as the package comes. Of course, I just can't order 4 jump rings. I'll have to purchase a few more things, won't I?

Wednesday, October 26, 2011

Copper Necklace - Part 2


And it keeps growing. Almost like a charm bracelet for the neckline. It's a great idea for all those leftover beads too. You can make the 'danglies' with odds and ends from your stash. I'm sorry I didn't change the background sooner in the photo's. It shows up so much better on the light background. More tomorrow.

Copper Necklace


Lots and lots of copper components and a variety of Swarovski crystals went into this necklace.
Inspiration for this piece was an ad by Beadaholiques in an old Bead and Button magazine. No one
was credited with the design, I think the ad was just to show off the components. I bought most of
my pieces from fusionbeads.com though.
Watch it grow!

Wednesday, October 5, 2011

Halloween Witch in the Moonlight


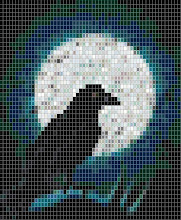
Here is a pattern created on Bead Creator Pro. I used two drop peyote here, using 11/0 delica beads. Finished piece measures 2" x 6.75". If you need more length, add additional rows at the beginning and end. 11/0 seed beads will make the piece slightly large.

Monday, October 3, 2011

Easy Wire Wrapped Ring


This is my first attempt at wire wrapped rings. I used 18 guage wire here. The main bead is 10 mm with 2 side beads. You can use any nice sized bead. I bought an inexpensive mandrel and ring sizer on ebay. It's a good starter kit.
Begin with a piece of wire 12-14". Center your bead(s) on the wire and bend each end snug against the bead. Determine your ring size and wrap the wire around the mandrel, just below your size.
The ring will get tighter are you work. You can stop here if you like a narrow band, but I like a little wider so I wrapped a second time. Keep one wire above the bead and one below the bead. Bend the lower
wire up and the upper wire down.
Wrap the ends of the wire snug up against the bead(s). Keep the coiling tight and smooth. Re-check sizing of the ring. Finish by trimming the wires and use crimping tool to tighten the cut ends so they don't scratch.